When I was planning my best friend’s baby shower, I immediately knew that I wanted to do onesie decorating. I love a cute craft.
But what I quickly learned was my idea of a good time was not necessarily everyone else’s. There was a lot of fear that the onesies would turn out… not good. My best friend’s mother was worried that the many of the onesies would end up unwearable, in the bottom of a drawer, and the wrong size. My mom’s other best friend spent weeks dreading that she didn’t have the artistic ability to make anything that would be fitting for an actual baby to wear.
So this was the challenge the Pinterest was not as helpful at solving as I thought it would be: how do you set up onesie decorating where everything is guaranteed to come out looking good? And how do you do it without iron on patches or vinyl?
One of the contenders was stencils that can be bought online, but if you’ve every worked with a cardboard stencil then you know it can be kind of a mess. The edges aren’t sharp. If it moves, you’re done for. But it is the easiest way if you are going to be using paint, and far more consistent than a stamp.
And then I learned about Cricut Stencil Vinyl, and let me tell you this is the thing. This is what you want if you want to guarantee it looks good. Unlike other stencils, this is a sticker that you can press right on to the onesie, which makes sure that the edges are pretty close to perfect. And using the Cricut Design Space you can design either use the designs other people have made or design your own. The result is a bunch of stencils that you know the parents will like.
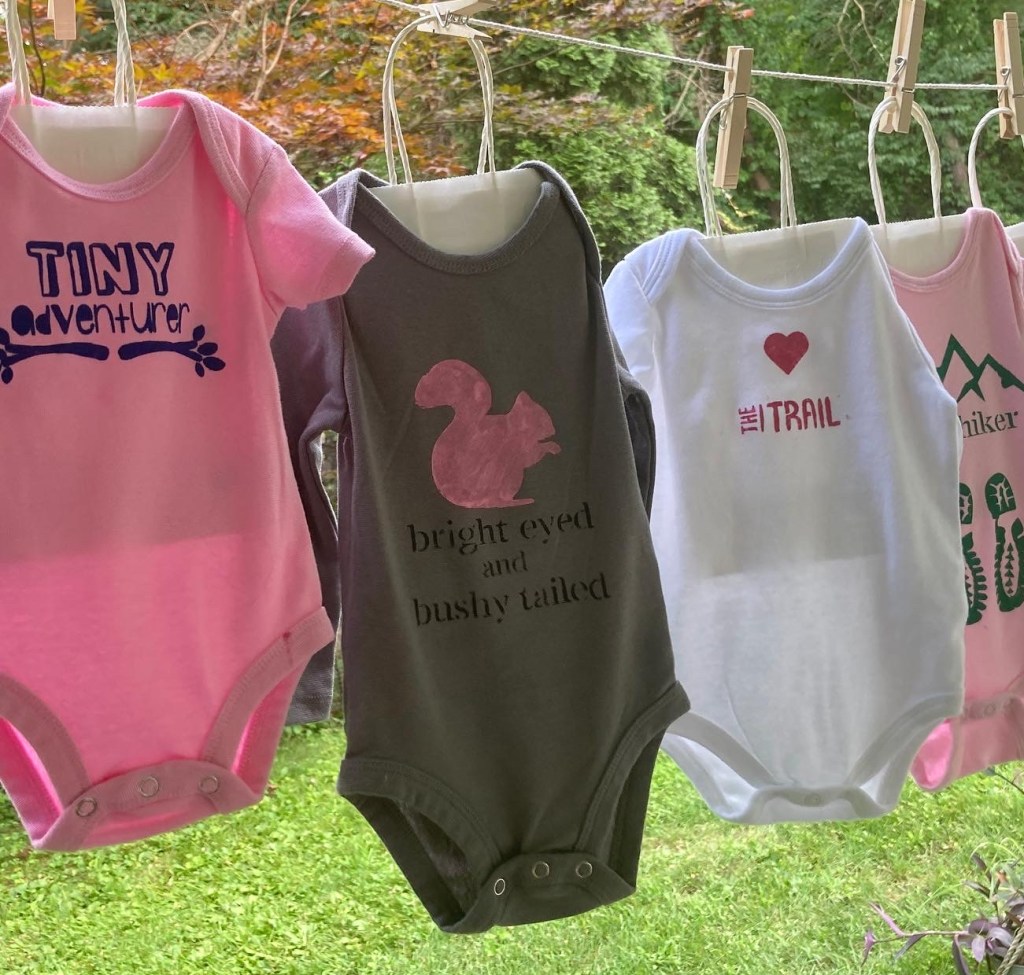
When it was party day, we just gave the pre-weeded stencils to the guests, some paint, and let them have it. The result was onesies the were described as “looking like someone bought them at a craft fair” and the mom-to-be was thrilled with them. They were way nicer than she had expected them to be, “I thought we would mostly use these for pajamas, but these are really good!”
That’s what I like to hear. Here are some tips for if you want to do something similar.
What do you need for a onesie decorating station?
The first thing you obviously need is a bunch of onesies. You’ll want to have a mix of sizes from newborn to 12 months, and when you’re purchasing consider the time of year the baby will be wearing the clothes. My friend’s baby had a September due date, so from 3-6 months, I purchased mostly long-sleeve onesies. You can find onesies from $2 to $3 a piece.
Next thing you need is fabric paint. After a bit of research, I went with Tulip soft fabric paint as it’s designed to work with soft stretchy fabrics like a onesie. I bought a multicolor pack, an extra black, and a soft pink. No one complained about the color selection so that seemed good. I also had a pack of fabric paint pens on hand, which a few people used. According to the instructions, you do need to wash the onesies before decorating them and they should be washed again 72-hours after they have been painted.
To apply the paint, I recommend a cut up sponge, though if you want to be fancier you could use a sponge brush. If you use a brush, the round style works much better than the rectangular style because they have a more even push.
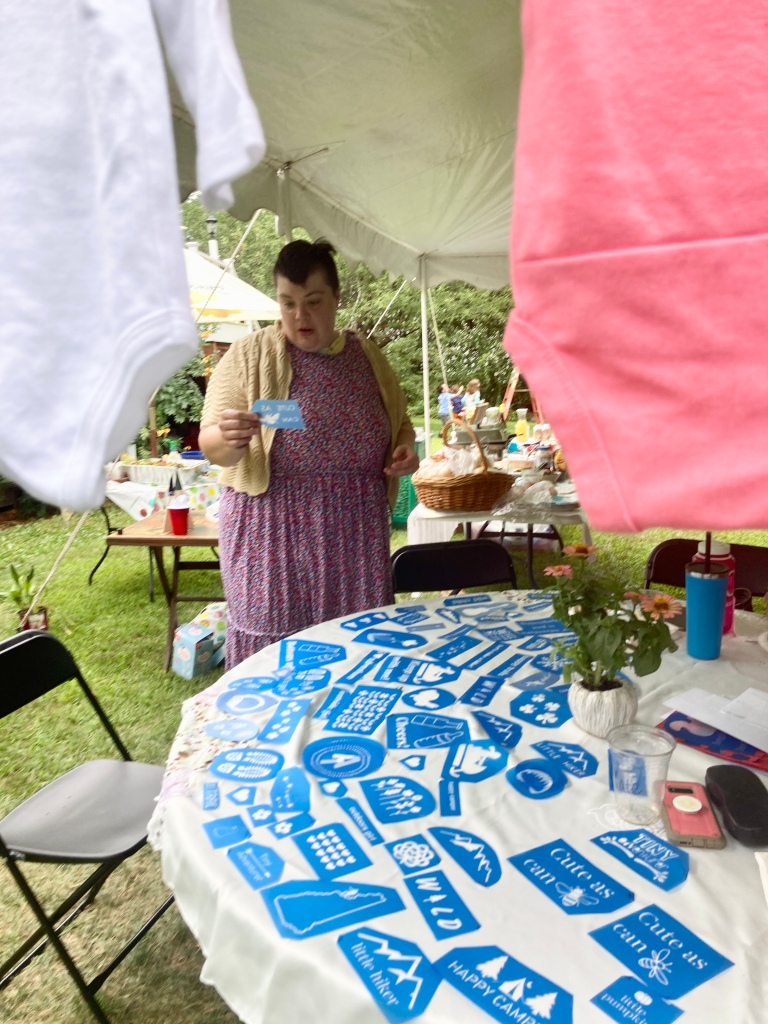
And of course, you need the above mentioned stencils. It works best if you weed them out so people can really see the stencil when they are choosing their design.
To make sure the paint doesn’t leak through the onesie to the other side, use paper gift bags with handles. Bonus, you can use the handles to hang the onesies up on a makeshift clothesline to dry. For the clothesline, you need some garden string and clothespins. Nothing fancy.
Nice to have on hand are some hand wipes for people to clean up with, if needed. Tape is helpful is people want to block off part of their stencil.
To boil that down to a quick shopping list: onesies, stencils, fabric paint, sponge or sponge brushes, paper gift bags with handles, tape and hand wipes.
Tips for how to paint a onesie
A few basic tips to help your guests out.
- When you apply the stencil, smooth it over with a credit card to make sure the edges are really sealed down to keep the lines crisp.
- You don’t need a lot of paint. Two lightly sponged on coats will try a lot nicer than one thick one and be easier to manage.
- If you are going to use more than one color, just switch applicators. Don’t try to use the same brush for two colors unless you want the colors to be mixed together.
- If you want to make sure that one area of the stencil is one color and the other is a different color, you can tape off parts of the stencil to eliminate the potential for mistakes.
- Sign the tag so that mom will know who made it!
- Relax. I promise it will come out fine.

Tips for making the stencils
- Ideally, a stencil is just one piece for people to stick on, but sometimes the object requires some smaller pieces. For example, in the letter a the center of the a would create a second piece to the stencil that the person has to stick on. You can use stencil fonts to help with some of this. My rule was to keep it to no more than 3 pieces per stencil to keep it manageable.
- Have some that are a complete designs, and then have some that are elements people can mix and match, such as words and objects.
- Test the size to make sure they look right on the onesie.

How to set up the onesie decorating station
We had an outdoor baby shower under a tent, so I used the oneies station as part of the decoration.
To set it up, I set up a clothesline around the perimeter of the tent and hung all of the onesies up at the start of the party. I then set up a table with all of the stencils for people to choose from. People went up table by table to chose their stencil and onesie. Then I went around the room dropping off a plate of brushes and a roll of tape, and then filling an egg carton with the paint colors that table wanted.
When they were done decorating, then hung the onesie back up on the clothesline, and the brushes, egg carton and scraps from the stencil were thrown away for an easy clean up.